
Travel 2020-2021
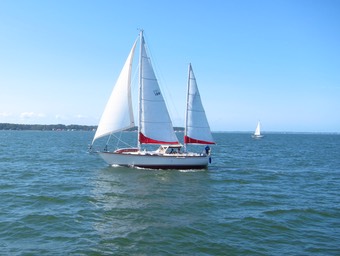
Cleaning and Sailing — This is the life

The galley is finally starting to feel like we live there again. We spent four days aboard; I did my day job from the boat using Herrington Harbour’s WiFi.
CA has cleaned. And cleaned. And cleaned. And investigated stuff we hadn’t looked at in years, and probably don’t need on the boat.
A Whitby has two deep insulated bins where refrigeration goes. (We’ve removed the cooling plates and compressors. For us, they’re not a fridge, they’re storage.)
There's another bin outboard of the sink. Plus shelves. Plus the secret space under the stove (where up for 14 wine bottles can be kept.)
It’s a lot of odd, unusual places to keep clean. CA pulled out every dish so she could clean all of it.
Surprisingly, we have a lot of dishes. Maybe service for six, I think. In addition to the galley, there’s the bar, with yet more glassware to be cleaned and stowed.
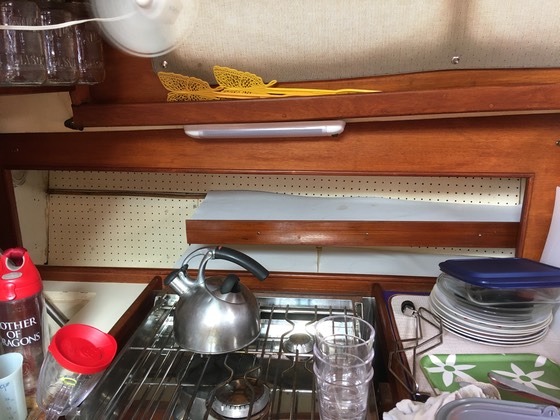 Here’s a view of some clean shelves. And the clean cooker.
Batteries
When you leave your boat for an extended period of time it’s very important to take the batteries out of everything.
This isn’t a casual “most things.” This is every damn thing on the boat with a battery.
That includes the AA battery that ignites the Force 10 cooktop. (It’s underneath the stove. Release the gimbal and tip it up.)
That includes the Brother PT-1290 Labeler. It has a handful of AAA batteries. We use it rarely. And it was hidden in the bottom of a cupboard. But. The batteries hadn't exploded (yay!) It seems designed for extended periods of being powered off.
I didn’t check my photo tachometer (used to measure engine RPM’s.) The batteries had exploded. It was almost salvageable. I got the ground wire soldered back on, but could not get the positive lead cleaned up and soldered back into place. Sigh.
Everything else had the batteries removed. They’re all clean and waiting for the massive battery replacement.

Old Wiring
Some of the old wiring was sketchy when it was new. It hasn’t gotten any better with age.
This dark image is two MC-4 FFM solar panel branch connectors.
The bits of white and black wire connect (eventually) to a pair of SunWize 24W solar panels on the foredeck. These panels had a simple wire harness with no connector. I put something together and wrapped it in electrical tape.
Electrical tape.
Exposed to the elements on the foredeck.
(And a rat’s nest of wires that are too long and coiled up in the cockpit. It’s pathetic. And has been pathetic for years.)
I’ve decided to start replacing the sketchy electrical mess with some better, IP67 connectors that involve much less electrical tape. That also means new MC4 connectors to the existing solar panel power feed. (There are five panels on the foredeck, four interconnected to one controller, and the fifth has no good explanation. There are way too many wires.)
I think this points to an interesting change in the way panels are sold. When I put the two 158W panels on the dodger, back in 2013, the wires were both black. I’m pretty sure they were bare.
I vaguely recall simply buying the only thing available: FFM MC4-style branch connectors. Since both wires were black, I had to label one as power and one as ground with loops of tape to be sure I wasn’t shorting something out. I suspect the panels might have been on sale for cheap because they were not compliant with the modern standards. I chose the exact wrong connection type for male and female.
It appears that some time between 2013 and today, solar panels now have mixed Male (ground) and Female (positive) connectors, black and red wires, and less confusion about connecting them to a controller. There are kits with FFM plus MMF branch connectors, since you’ll need both pairs. Also. Now that adapters and parts are more common, I think I can remove the rat’s nest of writing used to combine two dodger panels and two deck panels in parallel.
Upgrades
I think I need to move some of the planned 2023 maintenance up a few years, and replace *all* the solar panels before their 10-year life span. Why? Efficiency.
The existing deck panels are SunWize SC24 units, 13″ x 21″, producing 24W each. Nowadays, the Solarland SLP080-12M is a single 80W panel 13″ x 58″, about 16″ longer than the pair. There’s a SunPower CMP23070F that’s 70W and only 21″ x 28″. The Solartech SPM110P-FSW panel is 110W, but an immense 26″ x 48″. The replacement size may be too big for the spot between the hatch cover and the grab rail. If it can fit, though, we get 1.5× or maybe even 2× the power output. And cleaner wiring. And 5 more years of happy battery charging.

Outboard Fix
Our Nissan/Tohatsu 2-stroke outboard is (with some care) still going strong. Early on, we broke a thing called a lift bracket.
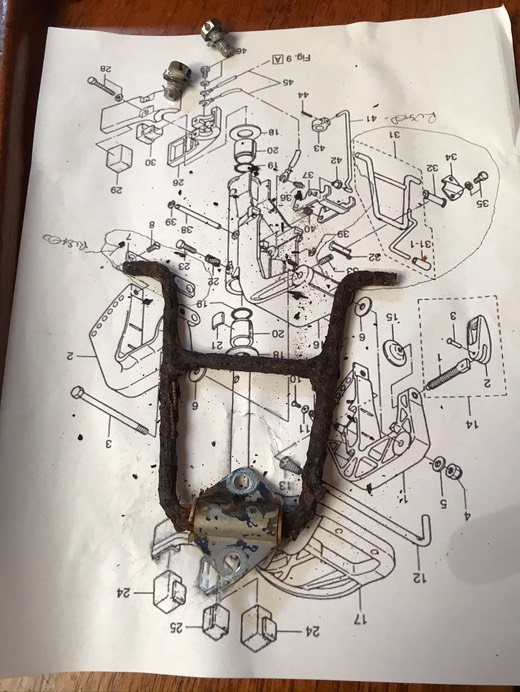 It’s part of the frame on which the outboard motor hangs on the transom of your dinghy. Studying the drawing, it seems to me there’s a motor, a choice of long or short drive shafts, and a “lower unit” with the gears and a propellor.
The lower unit tips up, to keep it clear of marine growth. And to make it possible to run the dinghy up on a beach.
This rusty thing has been broken since — I think — they day we first put our first dinghy into the water.
There’s a spring and a handle. The idea is for it to easily latch in the up position. You pull the handle to undo the catch holding it up, and it drops into the water. (Except in reverse, of course. With the transmission in reverse, it has to be held down by a separate “reverse lock”, and you can’t tip it up.)
Since this rusty bit never moved, it didn’t latch. Instead, we used a piece of line to tie the engine up. We did that for a while, but it’s a pain. I think we left the lower unit dragging in the water when we lived in Annapolis at anchor. Bad idea. Lots of propellor cleaning required.

After — what? — ten years of this lift bracket not working, I finally printed out the drawing. It’s been an open browser tab for at least two years. That’s how slow I am at jobs like this.
I lay the outboard on the deck where I could get a good look up inside the bracket. On the drawing, I checked off the broken, missing, or impossibly rusted parts. $75.00 of ‘em.
That’s not so bad. When the parts arrive, I have to reassemble it, but that seems manageable. The bracket “simply” bolts in place. I think.
If everything goes well, the outboard will latch up like it did when it was new. Yay!

Zincs (Sacrificial Anodes)
Having dissimilar metals in a salt water environment has consequences. Life-or death consequences. The galvanic current flow means your metal bits are dissolving. There are some clever tables providing details on how “noble” each metal (and alloy) is. The “Galvanic Series” and the “Anodic Index” show you what's happening to destroy your underwater metal parts.
This is simple chemistry. It’s inevitable. It cannot be reasoned with. It cannot be stopped. It’s relentless, ruthless, odorless, and grease-free. Since we can’t stop it, the best we can do is subvert it.
Some metals (for example, gold) barely have any chemical interactions with other metals. Then there’s zinc. It’s highly anodic, so a boat will carry sacrificial zinc anodes. In the presence of galvanic electrical flows, the zinc dissolves. The rest of the underwater metals — which are doing important work — can remain untouched.
Until, of course, the zinc is gone, then the next most anodic part starts to dissolve. Aluminum. Iron. Copper. 304 Stainless. Bronze. Brass. etc. You can see how lack of a zinc slowly destroys your boat.
The joke about aluminum hull boats is you can recharge the batteries with the galvanic currents that arise from throwing a penny in the bilge.
Stainless steel screws in an aluminum mast? Eventually, this combination will corrode even though it’s sticking up in the air and only touched by fresh-fresh rainwater.
Red Ranger has four sacrificial zinc anodes.
- A standard zinc wrapped around the 1¼″ stainless propellor shaft. Awkward to replace. One of these: https://anodeshack.com/streamline-collars-shaft-anodes-zinc?attribute_pa_shaft-size=1-1-4
- A tiny zinc on the outboard. This has lasted years. Unless the outboard lives in the water, in which case, it doesn’t last a year. One of these: https://www.defender.com/product3.jsp?name=tohatsu-nissan-outboard-motor-replacement-oem-sacrificial-anode&path=-1|299255|2284698|2284699&id=54202
- A zinc in the engine cooling system. This used to last about a year. Now that we have solar panels and the batteries are *always* charging, we have more current flow and the engine zinc is good for about six months. Mr. Lehman needs an E-1 zinc pencil. Here’s what they look like. https://www.boatzincs.com/engine-sizes.html
- A multi-pound zinc fish. This is connected to the ground plane. Because boat ground is interconnected to the rigging, it’s a simple clamp on the backstay. This: https://www.defender.com/product.jsp?id=150598
The fish is easy to inspect. Pull it up. Look at it. How much less than five pounds does it weigh?
The outboard is easy. It’s right above the propellor. A 10mm wrench is all you need to replace it.
The others? Not so much. The shaft zinc either requires a diver or a haul-out. This costs money. I replaced one in the Bahamas with a shark watching me. I was worried more about dropping one of the tiny nuts or bolts than I was worried about being eaten by a shark.
The engine is a messy job because the zinc is nearly inaccessible. Bonus: a half gallon of raw water pours out of the cooling system when you take out the zinc. This was today’s chore. Get a wrench on this zinc to see what condition it was in.
Here’s the first stage of the journey. Engine room. It’s in the shadowy corner. Top Right.
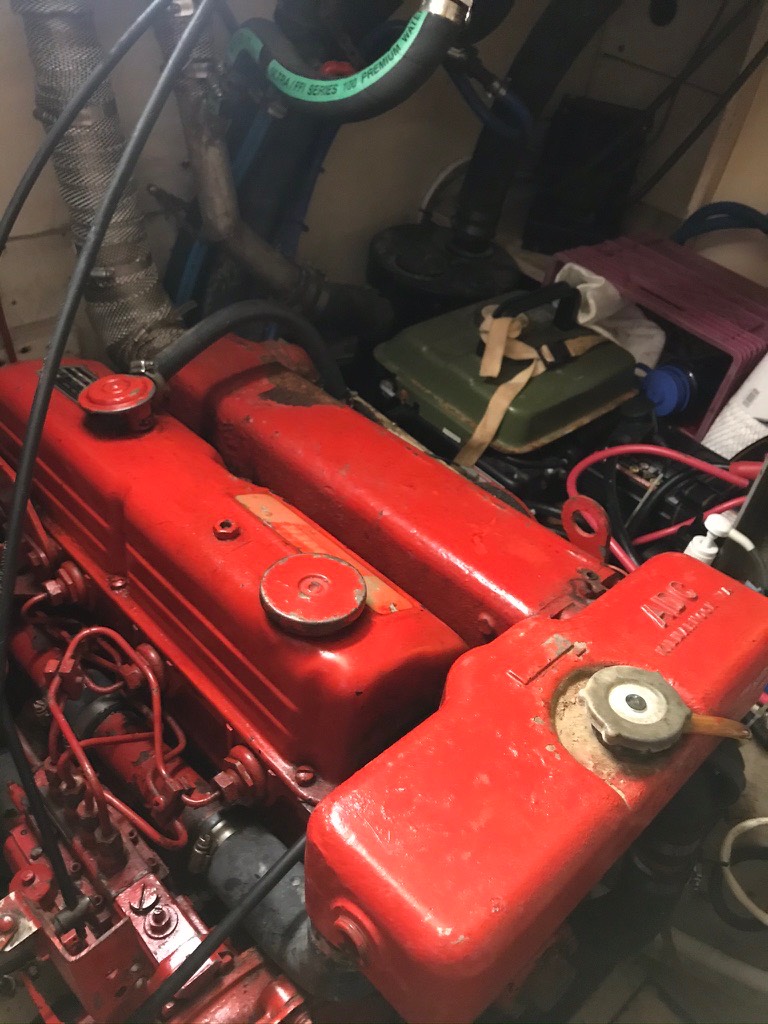
Here’s the reverse angle on the engine room. Top right of the image is the exhaust riser, wrapped in asbestos tape. To its right is a little rusty-looking elbow. (The rubber hose near them vents crankcase smoke into the air intake.)
Meanwhile, under the rusty elbow…
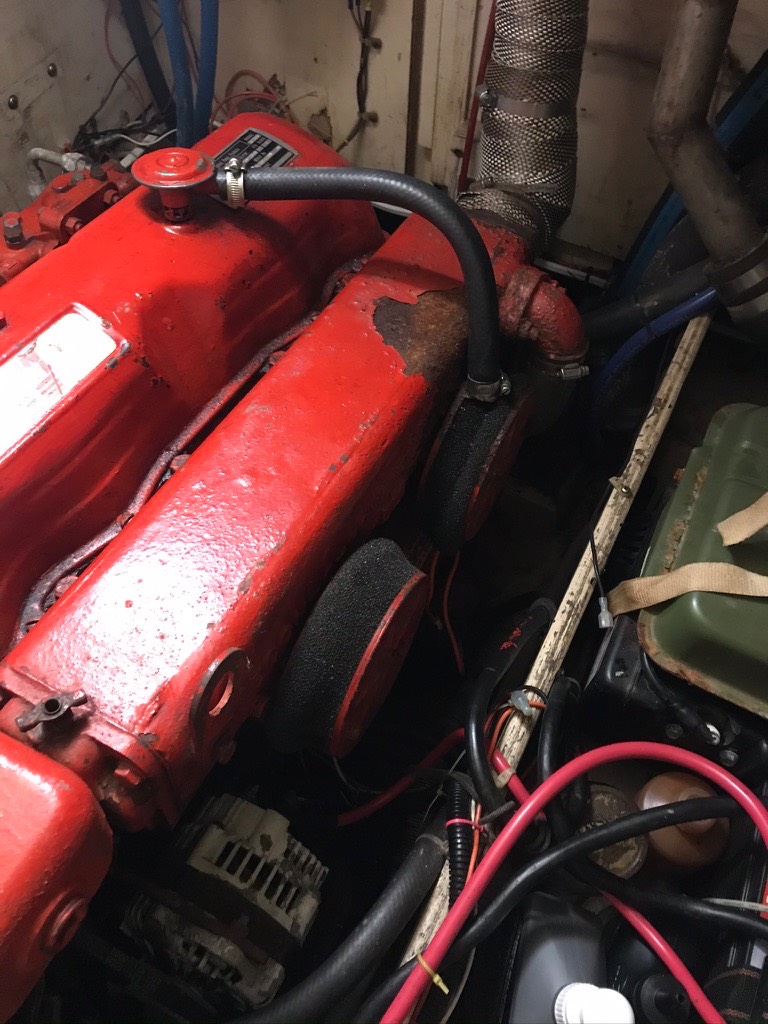
Where you can’t see it…
Is the main heat exchanger.
Here’s a view of the bottom of the heat exchanger. If you look closely by the rusty red thing on the right, you’ll see gray hair and an eye. That’s me. Taking a selfie holding my phone underneath the heat exchanger.
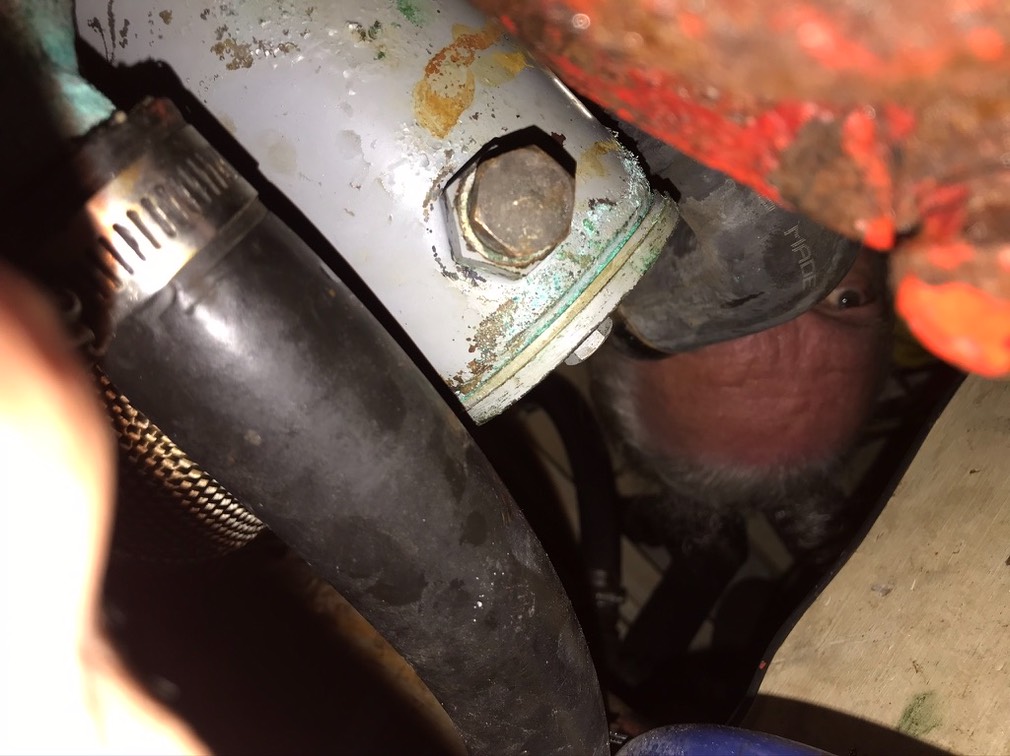
That’s an 11/16″ bronze fitting that holds the zinc pencil. And. The wrench can barely turn through an inch or two. It’s a long, slow set of tiny wriggles to back that piece out. A patient amount of fiddling to get the new one threaded correctly. And a lot of tiny wrench wriggles to reseat it.
(And yes, I neglected to paint the heat exchangers Lehman Red, which is also Rust-Oleum High Heat red. They’re still primer gray.)
I think with two universal joints and an extender, I could rig up a socket wrench to get that out. As it is, the ratchet box wrench is the tool of choice.
&media=http://www.itmaybeahack.com/TeamRedCruising/_Media/a2c29667-64a4-4d7c-8aa1_768.jpeg&url=http://www.itmaybeahack.com/TeamRedCruising/travel-2020-2021/zincs-sacrificial-anodes.html "Pin It")
“Recommissioning”
What’s required to get Red Ranger ready?
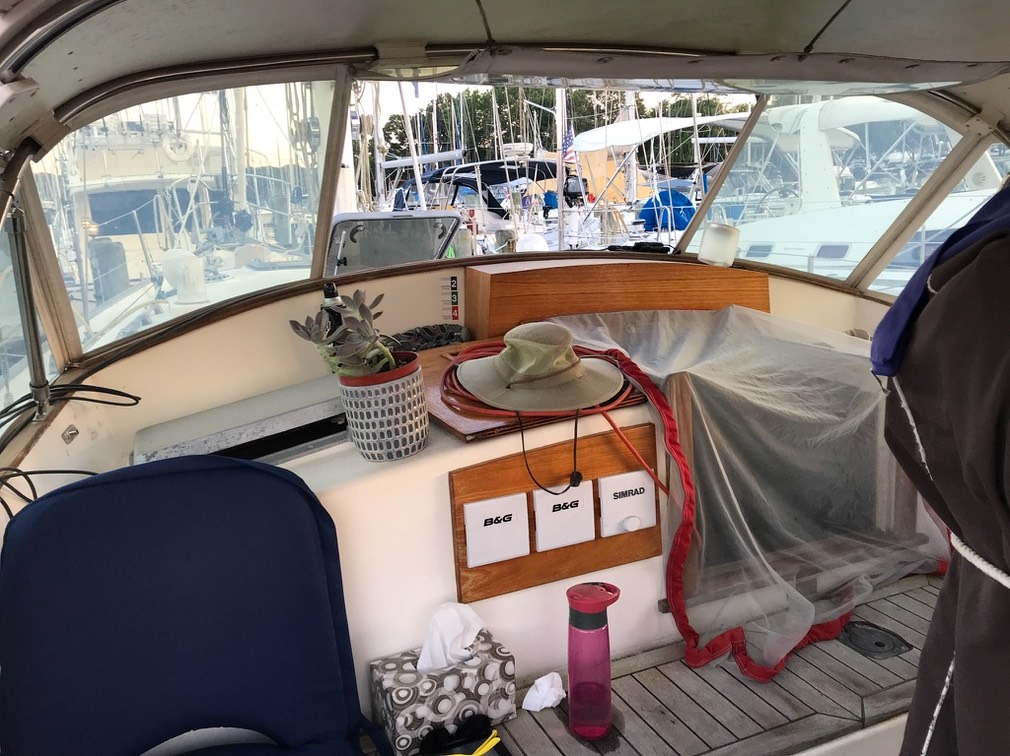
Cleaning. After over a year of sitting empty, Red Ranger is very dirty. So far, the galley is clean enough to cook in. The cockpit is now clean enough that we can start to look at the heads and berths.
Water. The port side tank (we thought) was mostly empty. It turns out it’s nearly full. And. Weirdly. The water is very, very clean. The last time we even looked in the tank was at least 18 months ago. Maybe longer.
I blame a chlorine shock treatment years ago. We put in about a quart of chlorine. It smelled like a swimming pool for weeks. But. Everything is still shiny clean inside the tanks. We’re able to wash (and shower) and generally run water through the system as fast as we can.
Heads. We’re going slow on commissioning the nature’s head. We’re at the dock. We can walk ashore. Forward head will be cleaned in the normal course of events.
Oil Change. Step 1 is to start Mr. Lehman to warm up the oil so it can all be pumped out. This is a nervous thing. Have we done all the maintenance rituals correctly?
After over a year of sitting idle, the engine started right away. Amazing.
The oil change went “smoothly” (Heheh. Smooth. Oil. Heheh.) I recall many years ago having absolute fits because I didn’t have the right tool or I slopped oil all over the place. This year? It was a thing of beauty.
Okay. It’s an oil change. But. I did it without any slip-ups or confusion or shouting from the engine room. So. I think it was delightful.
Same for the outboard lower-unit oil change. This is (generally) a nightmare because you push oil up into the lower unit until it’s full. Then slap a screw in the upper hole and rely on surface tension and atmospheric pressure to hold 12 oz. of 90-weight inside the lower unit until you can manage to get the other screw in place. Ugh.
Did it this year with minimal spillage. Nothing a yogurt tub and oil pad couldn’t handle.
Software. The updates are in an “all but one thing” state. The Simrad NAIS-400 has a software update available. But. There’s no easy way to do this from a Macintosh. There’s a windows app. But. I don’t think I want to go full Boot Camp for this. I certainly don’t want to pay a Windows licensing fee for one small job.
So. I’m still researching how to upgrade the SRT board inside the Simrad unit. A possibility is reverse engineering the .EXE file that comes with the download. I suspect there’s a NMEA command that’s required to upload the new software image (maybe some variation on the PSRT command? One hates to experiment and create a $500 brick.)
There’s an “admin” password required for these kinds of things. See http://yachtelectronics.blogspot.com/2011/02/srt-proprietary-ais-commands.html. We’ll be going slowly here.
Dock Lines. CA doesn’t like the old dock lines. They came with the boat, making them at least 10 years old. Some of them are looking ratty. They’re ⅝″ double braid: heavy and kind of short. Some experts suggest the minimum length for a dock line is the length of the boat. Add to that two spring lines that are 1.5 × length. So. I’m thinking of 4 40′ ⅝″ and 2 60′ ⅝″ double braid. Maybe we’ll keep the nicest two pieces of legacy line and put the rest in a recycling container.
Or. See the classic Hervey Garrett Smith The Arts of the Sailor: Knotting, Splicing and Ropework (Dover Maritime). There’s a way to make a rope mat. I’ve made a few, and they’re super handy. Made out of ⅝” line… They’d be fat. But. They keep heavy things from banging around.
We’ll keep the two pieces of 50′ ½″ twist, since they’re handy and not very bulky. I may tie a lineman’s loop into the middle of each one to make it slightly easier to drop them over the midship cleat.
We’re getting there. Much to do. Stay tuned.
